

Enhance SuiteCommerce Advanced Checkout with Custom Fields
NetSuite SuiteCommerce Advanced is a versatile e-commerce platform that provides businesses with the flexibility to create a seamless and personalized shopping experience for their customers. One effective way to enhance this experience is by incorporating custom fields in your checkout process. In this blog post, we will guide you through the process of creating and utilizing custom fields in the checkout page of your SuiteCommerce Advanced website. While we will use examples involving gift messages, these custom fields can serve a variety of purposes, catering to your specific business needs.
Step 1: Create a Custom Field in NetSuite
To begin, you’ll need to set up a custom field in NetSuite that can store various types of information, not just gift messages.
- Log in to your NetSuite account.
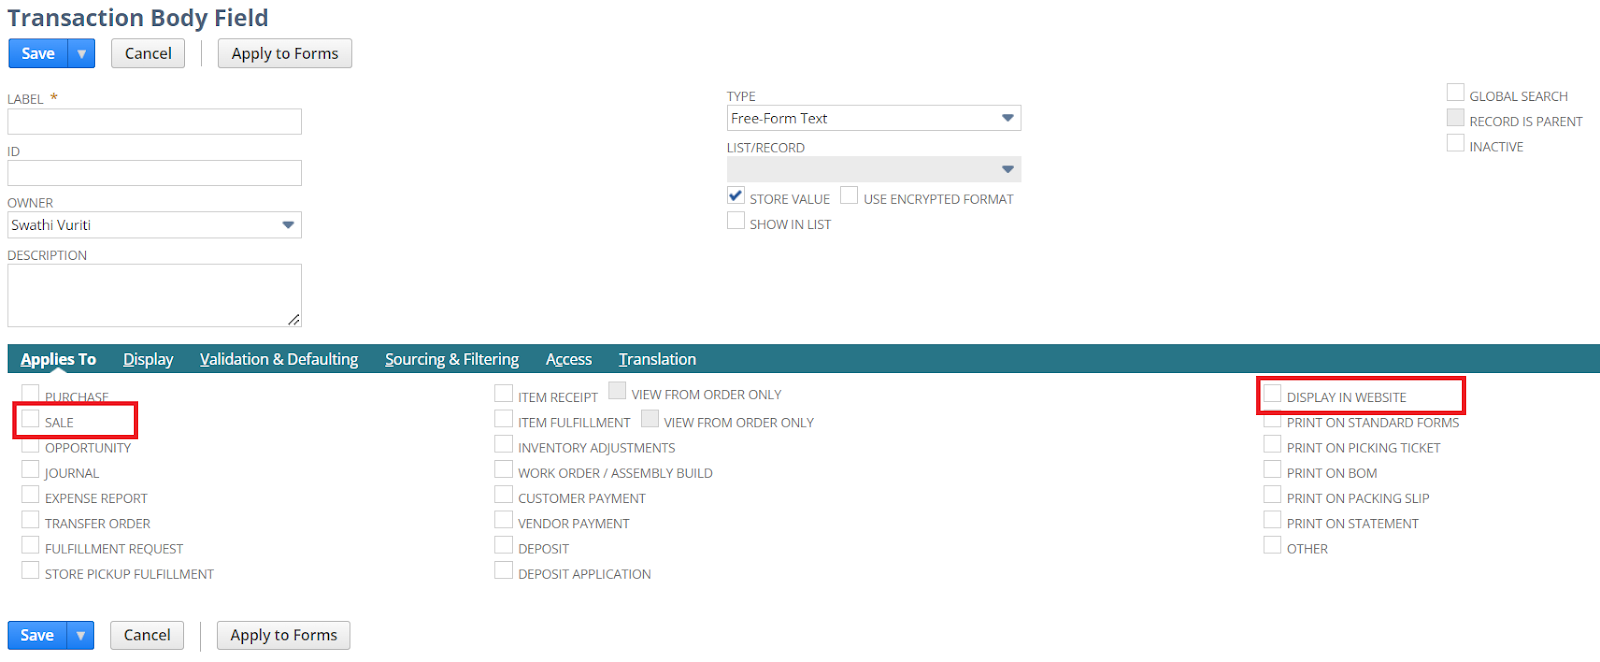
- Navigate to Customization > Lists, Records, & Fields > Transaction Body Fields.
- Create a new custom field with a name and field type that best fits your needs. Ensure it’s checked “Display in Website” and “Sales” under the Applies to tab.
- Save the custom field.
Step 2: Modify Your SuiteCommerce Advanced Checkout Page
With the custom field in place, you can now modify your SuiteCommerce Advanced checkout page to capture and display the desired information.
- Access your SuiteCommerce Advanced source code or developer environment.
- Identify the checkout template file where you want to include the custom field.
- Add an input field for the custom data, providing an appropriate label and field name.
- Ensure the input field’s name attribute matches the custom field’s ID in NetSuite.
- Make any necessary style adjustments to maintain your website’s design consistency.
- Save the changes to your checkout template.
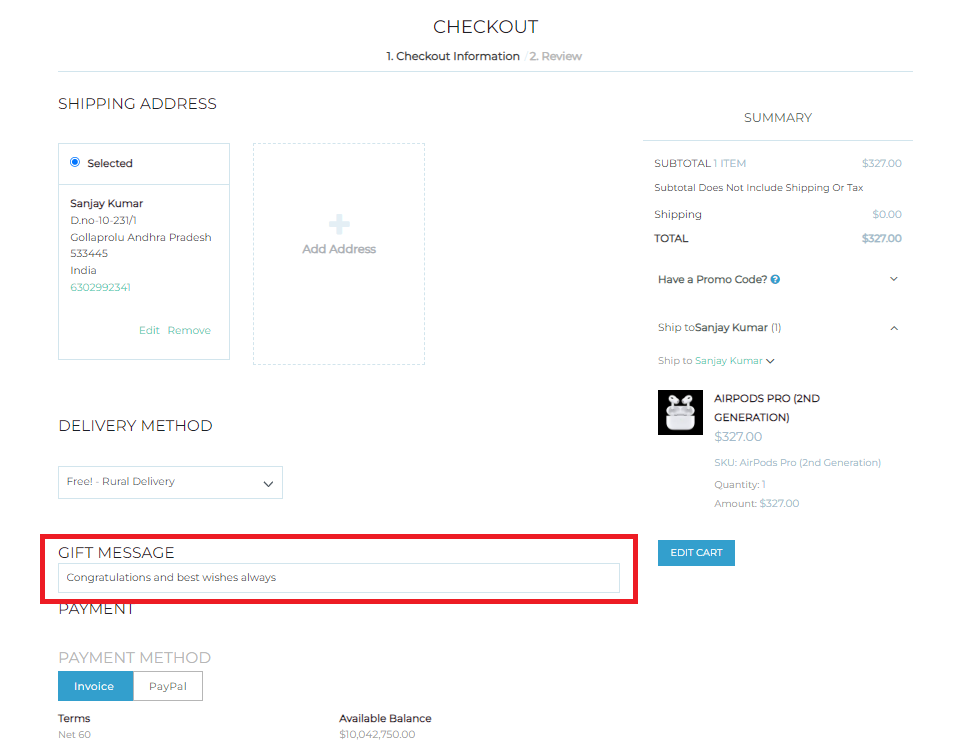
We can see the custom field in the checkout page is shown in the below highlighted image.
Step 3: Capture and Pass Custom Information
Now that you’ve added the custom field, you can proceed to capture the relevant information from the checkout page and send it to the Sales Order in NetSuite.
- In the JavaScript file responsible for the checkout process, create a function to capture the value of the custom field.
- Adjust the code that submits the order to include the captured custom information, sending it to NetSuite through the SuiteScript API.
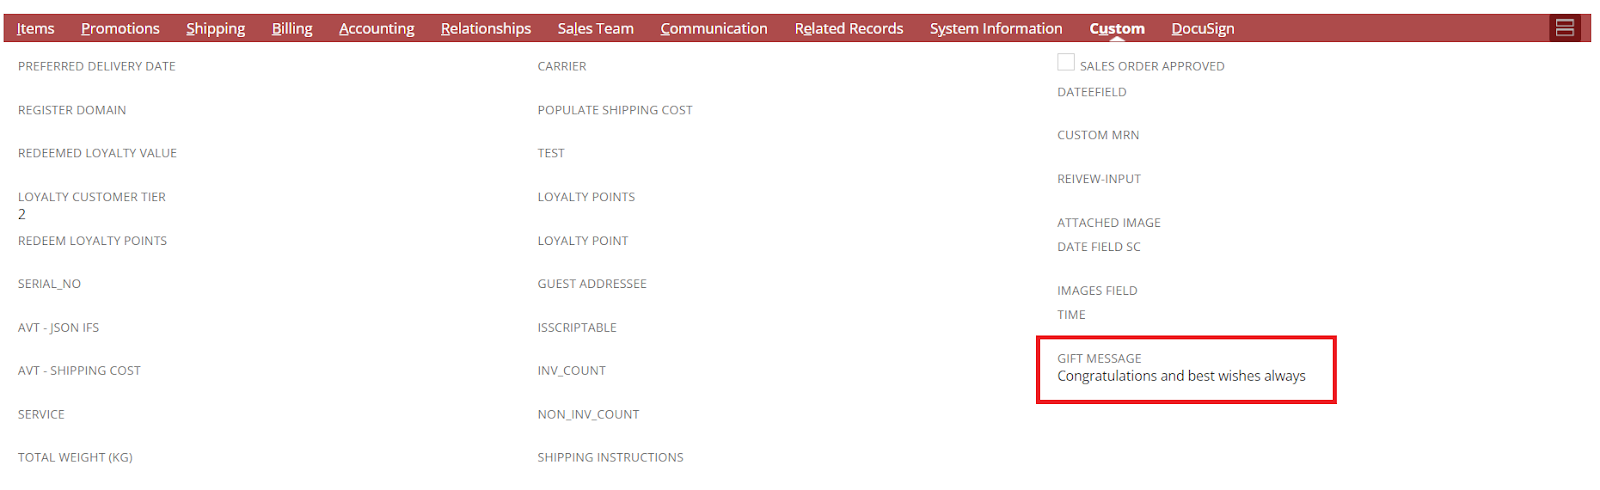
Here as shown in the below image we can see how it is saved in the Sales order.
Advantages of Custom Fields in Checkout
- Data Collection: Gather crucial data like gift messages or delivery instructions.
- Improved Customer Experience: Enhance the shopping experience with personalized input fields.
- Efficient Data Management: Tailor data collection to your needs, simplifying order processing and reporting.
- Streamlined Communication: Use collected data for communication with customers or for special order handling.
- Data Integrity: Standardized data entry reduces errors.
Conclusion
By following these steps, you can create and utilize custom fields in the checkout page of your SuiteCommerce Advanced website to cater to various purposes. This feature empowers you to offer a more personalized and tailored shopping experience to your customers, ultimately enhancing their interactions with your e-commerce platform. To ensure a seamless implementation, collaborate with developers experienced in SuiteCommerce Advanced and NetSuite integration.