

Integrating NetSuite With Shopify Using Celigo
Many users rely on Shopify for an easier way to launch their online stores, without having to deal with the hassle of servers or development costs that go with self-hosted platforms such as Magento. However, businesses that use Shopify for ecommerce and NetSuite for other core operational activities might find themselves faced with information silos. To make the most of their NetSuite investment and eliminate disparate sources of data, integration is key.
Integrating Shopify and NetSuite can help automate processes such as order fulfillment, inventory count updates, pricing updates, financial reporting and much more. Automation eliminates the need for manual data entry, thereby reducing order processing time and eliminating human error which can result in costly overheads. While integration saves users time and money, where it truly shines is in improving customer experience. With smoother backend processes, businesses can rest assured that they will always display inventory accurate levels online to avoid overselling, meet guaranteed delivery dates, ship the correct item, and so on.
So how can Shopify be integrated with NetSuite? While it can be achieved using a few different approaches, this blog will elaborate on the use of Celigo’s prebuilt integrations for Shopify.
Installation:
- Using the menu, navitage to the Celigo Marketplace.

- Search for Shopify and select it.

- Search for the Shopify-Netsuite installation and click install.


- Configure the connection.

- You can add existing Netsuite and Shopify connections here, or create new connections and then install an integrator bundle in NetSuite.
- Once the installation is complete, prebuilt basic flows for the Shopify-Netsuite integration will be visible.
Netsuite items to Shopify product: Basic flow

- This is a prebuilt flow with options that can be edited as needed.
- To begin, start editing the Source.

- Enter all the required information.
Saved searches: For the records being exported from NetSuite, a saved search will need to be created and used here. If the saved search is-
a. Public: Select the saved search directly from the list.
b. Private: Provide the internal id of the saved search.

- Next start editing the destination.

- Enter all the required information in the Shopify import.
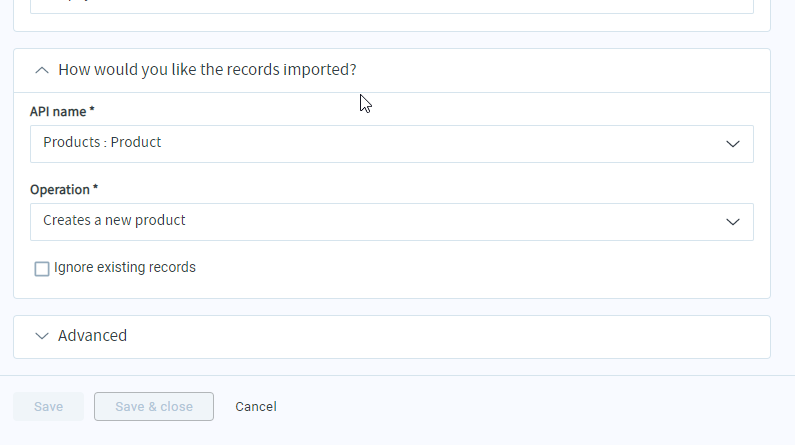
- API name will be the record you are trying to import into.
- Operation: Select one from the list.

- Mapping: Perform the required mapping between NetSuite and Shopify fields.

- Proceed with running the flow.
Shopify Customers to NetSuite Customers: Basic flow

- Start editing the Source, i.e the Shopify export.

- API name is the record you are trying to export.
- Operation: Select one from the list.

- Now edit the destination i.e., NetSuite import.

- Record type: The record type which you are trying to create in Netsuite.
- Operation: Add,Update,Add or Update,Attach,Detach. Select from those as per requirement.
Mapping:

- Proceed with running the flow.
Need help with integrating your NetSuite account with Shopify? 79Consulting can help! Schedule a free consultation with us today to learn more.