

Version Control in NetSuite Projects
What is Version Control?
Version control, also known as “source control,” is the practice of tracking and managing changes to software code. In the context of NetSuite development, version control serves as a safeguard against catastrophes, human errors, and unintended consequences. Version control systems are software tools designed to help software teams manage changes to source code over time. These systems keep a record of every modification to the code, allowing developers to compare previous versions and revert to a specific version when necessary.
Benefits of Version Control Systems:
- Enhanced Project Development Speed: Version control facilitates efficient collaboration, accelerating project development.
- Error Reduction: By tracking every small change, version control minimizes the likelihood of errors and conflicts during project development.
- Global Collaboration: Project contributors can collaborate from anywhere in the world, fostering a geographically diverse team.
- Disaster Recovery: Version control ensures recovery capabilities in the event of disasters or unforeseen situations.
For each contributor to a project, a separate working copy is maintained, and changes are not merged into the main file until the working copy is reviewed and validated.
One of the most popular version control tools we will explore further in this blog is Git. We will provide detailed steps on how to connect and use GitHub as a version control system for your NetSuite Scripting Projects.
Steps to Establish a Connection with GitHub from VS Code
Pre-Requisites:
- Visual Studio Code
- Git (at least version 2.0.0)
- GitHub Repository
- Node.js version 16.14.2 LTS
Establishing a Connection with GitHub from VS Code:
- Ensure Git is installed. VS Code relies on your machine’s Git installation (at least version 2.0.0), so you must install Git first.
- Create a Suitecloud Project in VS Code:
- Go to View > Command Palette > Suitecloud > Create project
- Source Control:
- Go to View > Source Control (SCM) (Ctrl+Shift+G)
- Initialize the repository:
- “main” is the default branch
- Open the Command Palette.
- Go to View > Command Palette (Ctrl+Shift+P)
- Choose “Git: Rename Branch”
- File version control status:
- U – Untracked file
- A – Added file
- M – Modified file
- Commit files:
- Click the Commit ☑️(checkmark) button
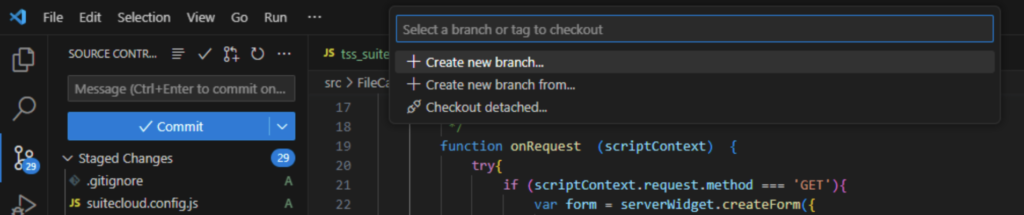
- Create a branch:
- Use “Git: Create Branch”
- Diff editor:
- Use the Inline View button
- Stage changes:
- Click the Stage Changes ➕ button
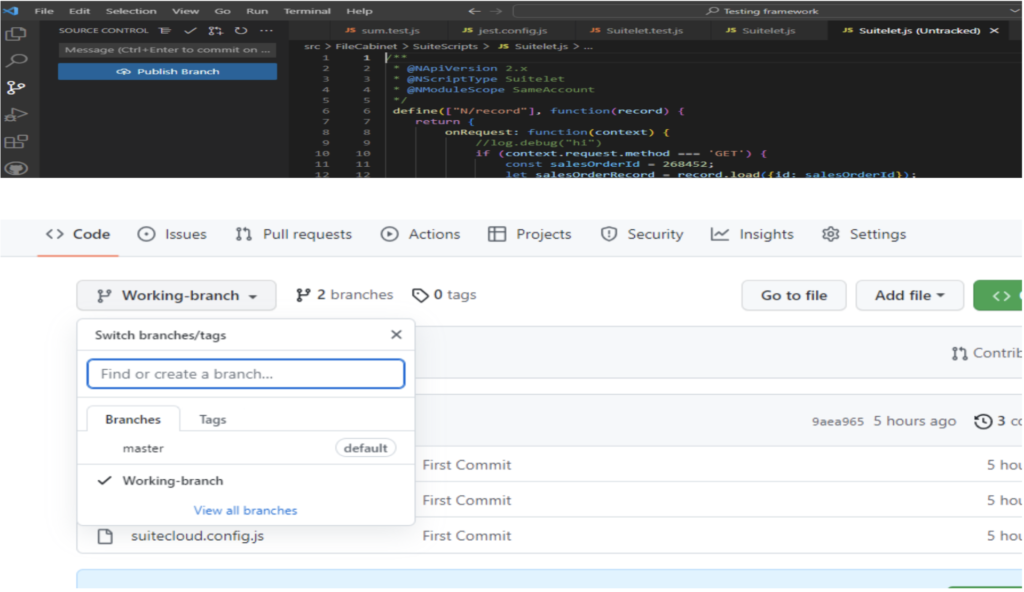
- Switch branches:
- Find the Status bar branch item (lower left)
- Merge branches:
- Go to Views and More Actions (…) > Branch > Merge Branch
- Publish branch to GitHub
The Source Control icon in the Activity Bar on the left provides an overview of the number of changes in your repository. Clicking the icon reveals details of your current repository changes: CHANGES, STAGED CHANGES, and MERGE CHANGES.
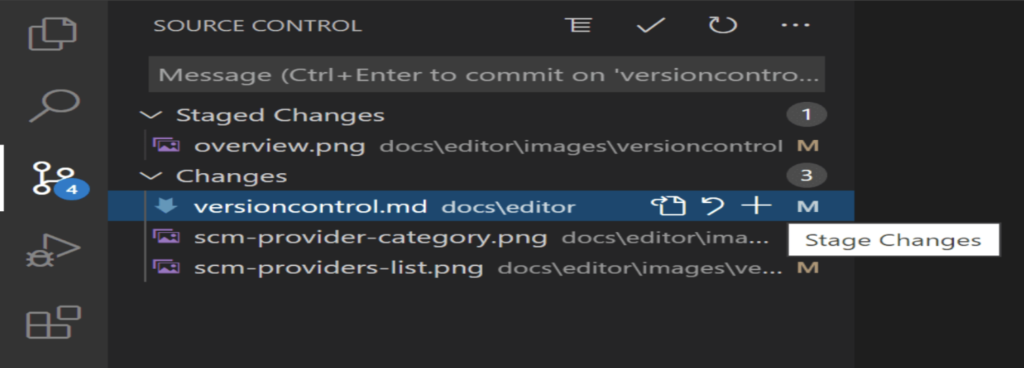
You can click each item to view textual changes within each file. Note that for unstaged changes, you can still edit the file in the right editor. File status indicators and the number of commits on the current branch are visible in the repository. You can checkout any branch in your repository by clicking the status indicator and selecting the Git reference from the list.
Creating a Repository:
Visual Studio makes it easy to create a repository directly from the IDE. Repository creation from Visual Studio is optimized for GitHub but can work with the Git provider of your choice. With a GitHub account, you can enjoy full GitHub support within the Visual Studio IDE to manage your code and collaborate with others on development projects. To host your project on GitHub, create a repository.
Branches and Tags:
A branch is a workspace where you can make changes without affecting the live site. You can create and switch branches directly within VS Code using the “Git: Create Branch” and “Git: Checkout to” commands in the Command Palette (Ctrl+Shift+P). Alternatively, you can create a new branch by clicking “Create new branch.”
Here, you can publish the branch after committing changes to GitHub.
Git Status Bar Actions:
In the Status Bar, next to the branch indicator, there is a “Synchronize Changes” action when the current checked-out branch has an upstream branch configured. “Synchronize Changes” pulls remote changes to your local repository and pushes local commits to the upstream branch. If there is no upstream branch configured and the Git repository has remotes set up, the “Publish” action is enabled, allowing you to publish the current branch to a remote.
In summary, version control, notably Git and GitHub integration in Visual Studio Code, is a crucial asset for managing NetSuite projects. It streamlines collaboration, minimizes errors, and supports global teamwork. The steps detailed here offer a practical approach to establishing and using version control effectively, allowing for agile development and code stability. Embracing version control tools is essential in the dynamic realm of NetSuite scripting, ensuring organized, error-free project management. For further guidance please contact our team of NetSuite experts for expert assistance.